Category: DIY Betates

12 Jan

Simple Real Estate Photo Editing: A Game-Changer for Sale Potential

In today’s competitive real estate market, stunning visuals are no longer just a luxury; they’re a necessity. Professional-quality photographs can significantly enhance the appeal of your property listings, attracting more potential buyers and ultimately leading to quicker sales and higher offers. While hiring a professional photographer is one option, simple real estate photo editing techniques can also make a dramatic difference in the presentation of your property.

Why Photo Editing Matters

Even the most professionally captured photos can benefit from some basic editing. Photo editing allows you to:

  • Enhance Visual Appeal: By adjusting brightness, contrast, and color balance, you can create more vibrant and eye-catching images.
  • Correct Imperfections: Remove distracting elements like power lines, unwanted objects, or minor blemishes to create a clean and polished look.
  • Highlight Key Features: Draw attention to specific features of the property, such as a beautiful backyard, a spacious kitchen, or a stunning view.
  • Create a Consistent Brand: Apply a consistent editing style to all your photos, creating a cohesive and professional brand image.

Essential Photo Editing Techniques for Real Estate

Here are some essential photo editing techniques that can significantly enhance your real estate listings:

1. Straightening Lines:

Ensuring your photos have straight lines is a fundamental aspect of professional real estate photography. It creates a sense of balance and order, making the property appear more appealing.

  • Importance: Straightening crooked lines in your photos can create a sense of order and professionalism.
  • How to: Use the straightening tool in your photo editing software to align horizontal and vertical lines.

2. Adjusting Exposure:

Proper exposure is crucial for capturing the true beauty and details of a property. It ensures that the images are neither too dark nor too bright, allowing potential buyers to see the space clearly.

  • Importance: Proper exposure is crucial for showcasing the true colors and details of a property.
  • How to: Use the exposure adjustment tool to brighten or darken your photos and balance the light levels.

3. Correcting White Balance:

Accurate color representation is essential in real estate photography. Correcting the white balance ensures that the colors in your photos appear natural and true to life.

  • Importance: Correct white balance ensures that colors are accurately represented, avoiding a yellowish or bluish tint.
  • How to: Use the white balance tool to adjust the color temperature and create a neutral white balance.

4. Cropping:

Cropping allows you to focus on the key elements of a photo, removing any unnecessary distractions and creating a more visually appealing composition.

  • Importance: Cropping can help you focus on the most important aspects of the photo and remove unnecessary distractions.
  • How to: Use the cropping tool to remove unwanted areas of the image and create a more visually appealing composition.

5. Removing Distractions:

Sometimes, even the most carefully composed photos can contain distracting elements. Removing these distractions can significantly improve the overall aesthetic of your images.

  • Importance: Removing distracting elements can significantly improve the overall look of your photos.
  • How to: Use the clone stamp or healing brush tools to remove objects like power lines, cars, or people from your images.
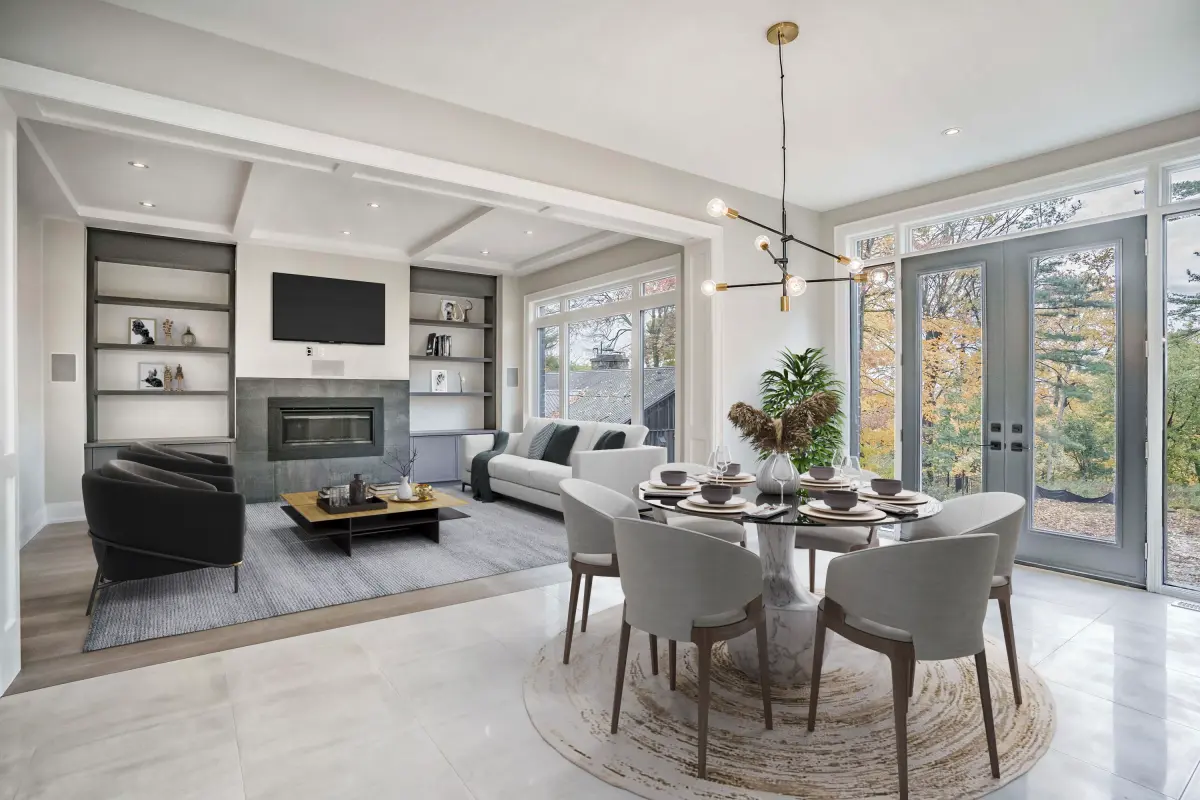
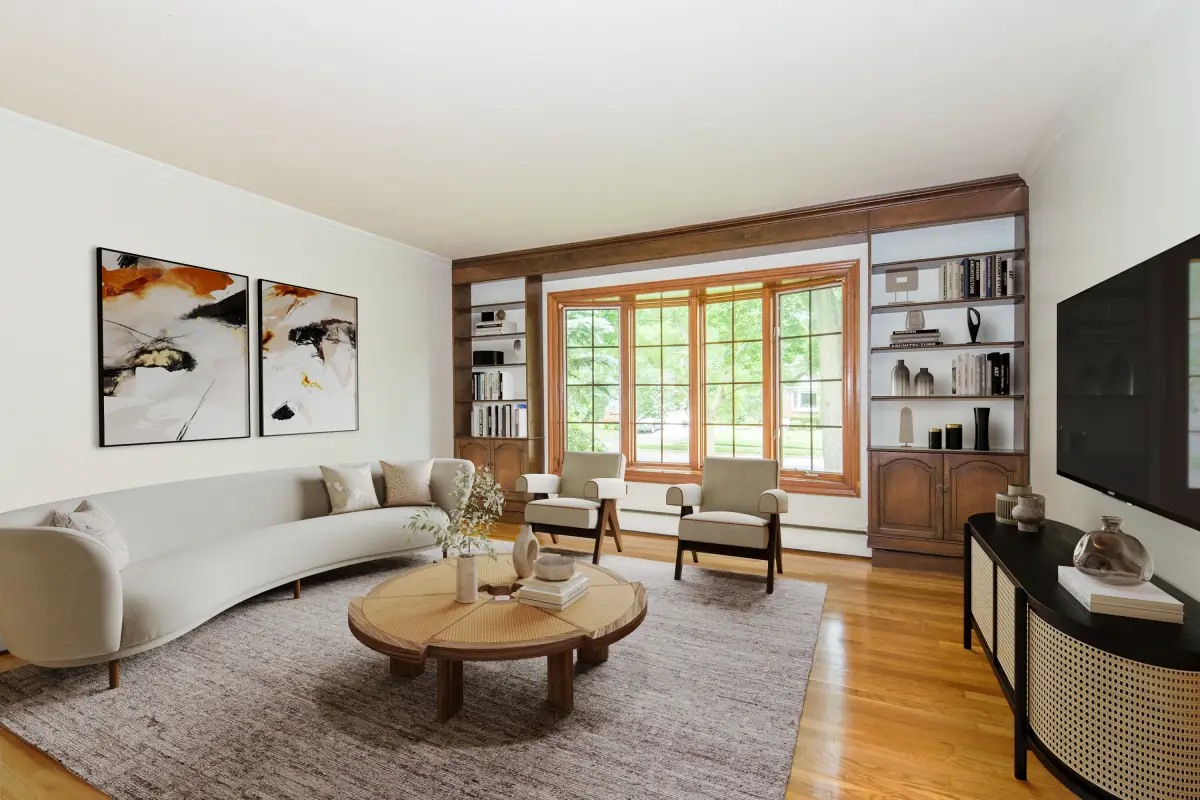
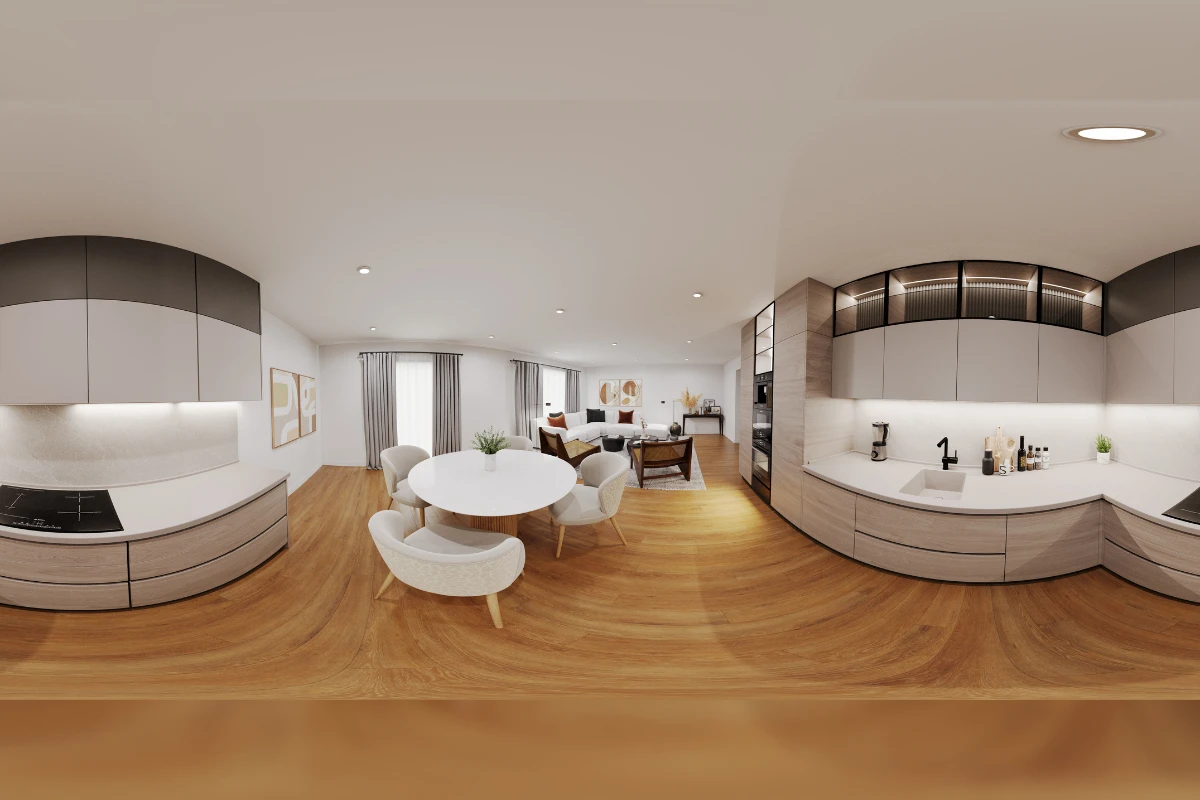
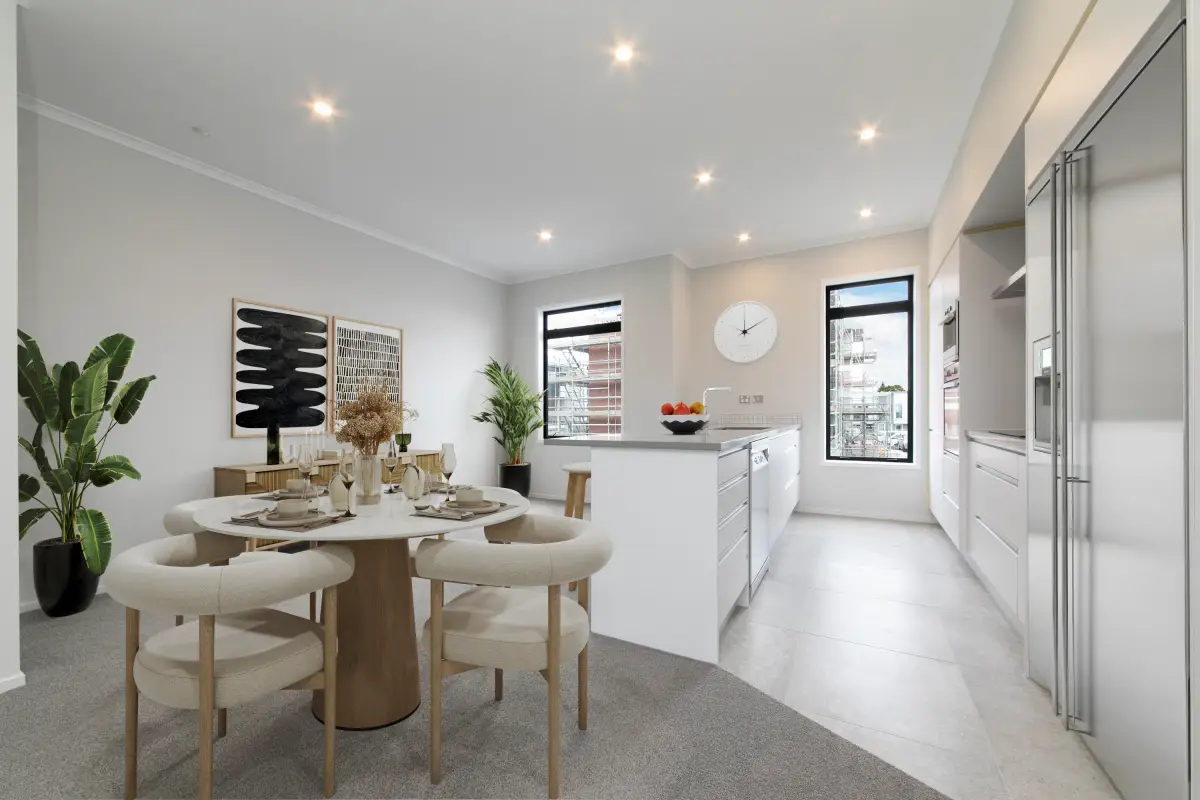
6. Virtual Staging:

Virtual staging is a powerful tool for showcasing the potential of empty or unfurnished properties. It allows you to add furniture, décor, and even landscaping to your photos, creating inviting and aspirational scenes.

  • Importance: Virtual staging can transform empty rooms into inviting spaces, helping potential buyers visualize the property’s potential.
  • How to: Use virtual staging software to add furniture, décor, and landscaping to your photos.

7. Adding Filters:

Filters can be used to enhance the mood and atmosphere of your photos, creating a more engaging visual experience for potential buyers.

  • Importance: Filters can enhance the mood and atmosphere of your photos, creating a more engaging visual experience.
  • How to: Use filters to add warmth, coolness, or a vintage effect to your images.

Choosing the Right Photo Editing Software

There are numerous photo editing software options available, ranging from free tools to professional-grade software. Here are a few popular choices:

  • Adobe Photoshop: The industry-standard for photo editing, offering advanced features and flexibility.
  • Adobe Lightroom: A powerful and user-friendly software for photo organization, editing, and sharing.
  • Canva: A versatile design tool that offers basic photo editing features, perfect for beginners.
  • GIMP: A free, open-source alternative to Photoshop, offering many similar features.
  • DIY Betates Virtual Staging Platform: This user-friendly platform specializes in virtual staging, offering a range of furniture and décor options to enhance your property photos.

By mastering these simple photo editing techniques, you can significantly enhance the visual appeal of your real estate listings and attract more potential buyers. Remember, a picture is worth a thousand words, so make sure your photos are telling the right story.

12 Jan

Choosing the Right Virtual Staging Partner: A Comprehensive Guide to Vendor Selection Criteria

In the world of real estate, first impressions are everything. Virtual staging has emerged as a powerful tool to captivate potential buyers and showcase properties in their best light. But with a growing number of virtual staging companies vying for your business, how do you choose the right partner? Selecting the right vendor is crucial to ensure high-quality results, timely delivery, and a seamless experience. This comprehensive guide outlines the key vendor selection criteria to consider when choosing a virtual staging company.

1. Quality of Visuals:

The foundation of successful virtual staging lies in the quality of the visuals. Look for a vendor who can create stunning, photorealistic images that truly capture the imagination of potential buyers. Here are some key aspects to consider:

  • Photorealistic Rendering: The most important factor is the realism of the virtually staged images. Look for vendors who create images that are indistinguishable from professionally staged photographs. Pay close attention to lighting, shadows, textures, and the overall ambiance.
  • Attention to Detail: Assess the vendor’s ability to capture subtle details, such as accurate furniture scaling, realistic décor placement, and appropriate lighting fixtures. A keen eye for detail elevates the overall quality and believability of the staged images.
  • Style and Design Expertise: Review the vendor’s portfolio to evaluate their design aesthetic and versatility. Can they cater to various styles, from modern and minimalist to traditional and eclectic? Choose a vendor whose style aligns with your target audience and property types.
  • Image Resolution and Format: Ensure the vendor provides high-resolution images in formats suitable for various marketing channels, including online listings, print brochures, and social media.

2. Technology and Turnaround Time:

Efficiency and speed are crucial in the fast-paced real estate market. Consider the vendor’s technological capabilities and their ability to deliver high-quality results within your required timeframe.

  • Software and Tools: Inquire about the software and technology used by the vendor. Advanced 3D rendering software and proprietary tools can significantly impact the quality and realism of the virtual staging.
  • Turnaround Time: Time is of the essence in real estate. Discuss the vendor’s turnaround time for delivering staged images. A reliable vendor should provide clear timelines and meet deadlines consistently.
  • Revision Process: Understand the vendor’s policy on revisions. How many rounds of revisions are included? What is the process for requesting changes? A flexible and responsive revision process is crucial for achieving the desired results.

3. Pricing and Packages:

Budget is always a key consideration. Look for a vendor who offers transparent pricing, competitive rates, and flexible packages that align with your needs.

  • Transparent Pricing: Choose a vendor with a clear and transparent pricing structure. Beware of hidden fees or unexpected charges.
  • Value for Money: Evaluate the pricing in relation to the quality of work, turnaround time, and customer service offered. Don’t solely focus on the cheapest option; consider the overall value proposition.
  • Customization Options: Look for vendors who offer flexible packages and customization options to suit your specific needs and budget. Some vendors may offer a la carte services, allowing you to choose only the services you require.

4. Customer Service and Communication:

A strong working relationship with your virtual staging vendor relies on effective communication and excellent customer service.

  • Responsiveness and Communication: Effective communication is vital for a successful partnership. Choose a vendor who is responsive to inquiries, provides timely updates, and is readily available to address your concerns.
  • Client Testimonials and Reviews: Research the vendor’s reputation by reading client testimonials and online reviews. This can provide valuable insights into their customer service, reliability, and overall satisfaction levels.
  • Dedicated Account Manager: For ongoing projects or high-volume needs, consider a vendor who provides a dedicated account manager. This ensures personalized attention and streamlined communication.

5. Experience and Expertise:

Partnering with an experienced virtual staging company can provide you with valuable insights and ensure high-quality results.

  • Industry Experience: Look for vendors with a proven track record in the real estate industry. Experienced vendors understand the nuances of property marketing and can provide valuable insights.
  • Portfolio and Case Studies: Review the vendor’s portfolio to assess their experience with different property types, styles, and target audiences. Case studies can demonstrate their ability to deliver results.
  • Understanding of Target Markets: Choose a vendor who understands your target market and can tailor the virtual staging to appeal to potential buyers.

6. Additional Services:

Enhance the buyer’s experience and showcase properties in their best light with a range of value-added services.

  • Virtual Tours and 360° Views: Some virtual staging companies offer additional services like creating virtual tours, 360° panoramic views, and interactive floor plans. These can enhance the buyer’s experience and provide a more immersive view of the property.
  • Video walkthroughs: Consider vendors who can create video walkthroughs of the virtually staged property. This adds another dimension to the presentation and can further engage potential buyers.
  • Day-to-dusk conversions: If you require images showcasing the property at different times of day, inquire about day-to-dusk conversion services.

7. Security and Confidentiality:

Protect your property photos and sensitive information by choosing a vendor with robust security measures and clear confidentiality agreements.

  • Data Security: Ensure the vendor has robust data security measures in place to protect your property photos and information.
  • Confidentiality Agreements: Discuss confidentiality agreements to safeguard your intellectual property and ensure the vendor does not misuse your images.

By carefully considering these vendor selection criteria, you can confidently choose a virtual staging partner who will help you elevate your listings, attract more buyers, and achieve your real estate goals. Remember, a successful partnership with a virtual staging company can be a game-changer in today’s competitive market.

12 Jan

Transform Your Listings with DIY Virtual Staging: Boost Sales & Save Money

In today’s competitive real estate market, captivating visuals are essential to attract buyers and make your listings stand out from the crowd. Professional staging can be an effective way to achieve this, but it often comes with a hefty price tag. DIY virtual staging offers a powerful and cost-effective alternative, empowering you to transform your property listings with stunning visuals – all from the comfort of your computer.

Imagine showcasing a beautifully furnished living room, a cozy bedroom with stylish décor, or a vibrant kitchen ready for entertaining, even if the property is currently empty or outdated. With DIY virtual staging, you can create aspirational scenes that resonate with potential buyers and help them envision the possibilities of a space.

1. What is DIY Virtual Staging?

DIY virtual staging utilizes technology to digitally furnish and decorate empty or unfurnished spaces. Using user-friendly software or online platforms, you can add furniture, décor, and even landscaping to your property photos, creating a captivating and aspirational vision for potential buyers. This allows you to present a polished and inviting image of the property, regardless of its current condition.

2. The Benefits of DIY Virtual Staging:

DIY virtual staging offers a compelling array of advantages for real estate professionals, homeowners, and anyone looking to showcase a property in its best light. From significant cost savings to enhanced marketing capabilities, the benefits are numerous:

  • Cost-Effective: Say goodbye to hefty staging fees and furniture rentals. DIY virtual staging offers a budget-friendly alternative, saving you hundreds, even thousands of dollars.
  • Time-Saving: Stage a property in minutes, not days. With DIY virtual staging, you can quickly transform photos and get your listings live faster.
  • Unlimited Design Possibilities: Experiment with various styles, furniture arrangements, and color palettes to appeal to a wider range of buyers.
  • Highlight Key Features: Emphasize the property’s best features and minimize any drawbacks.
  • Enhanced Marketing Materials: Elevate your listings with eye-catching photos that stand out from the competition. Use staged images across all marketing channels, including online listings, social media, and printed brochures.
  • Increased Buyer Engagement: Capture the imagination of potential buyers with visually appealing spaces that allow them to envision themselves living in the property.
  • Wider Reach: Showcase the property’s potential to a broader audience, including international buyers and those relocating from afar.

3. DIY Virtual Staging Tools & Tips:

Ready to dive into the world of DIY virtual staging? Here are some tips to help you get started and achieve stunning results:

  • Choose the right software: Explore user-friendly platforms like [mention specific platforms, e.g., Virtual Staging Solutions, PadStyler, roOomy] that offer a range of features and customization options.
  • Start with high-quality photos: Ensure your property photos are well-lit, clear, and showcase the space accurately.
  • Focus on realism: Create natural-looking scenes with appropriately scaled furniture and realistic décor.
  • Don’t overstage: Keep it simple and avoid cluttering the space with too many items.
  • Consider your target audience: Tailor the staging style to appeal to the likely buyer demographic for the property.

DIY virtual staging puts the power of visual transformation in your hands. By embracing this innovative technology, you can enhance your listings, attract more buyers, and ultimately sell properties faster and for a better price. Whether you’re a real estate agent, homeowner, or property developer, DIY virtual staging offers a flexible and affordable solution to elevate your marketing efforts and showcase the full potential of any space. So, why not give it a try and see the difference it can make in your next listing?

26 Mar

DIY Betates Ultimate Guide | Online Virtual Staging Platform

DIY Betates offers a cutting-edge virtual staging tool that transforms your browser into a powerful platform for interior design. With its intuitive drag-and-drop interface, you can effortlessly stage empty properties with an array of design styles. Our extensive graphics library and advanced AI-powered staging capabilities ensure that your listings stand out, catering to diverse aesthetic preferences — from the clean lines of Scandinavian design to the timeless appeal of Mid-Century Modern, and the uncluttered simplicity of Minimalism.

Moreover, our platform includes a special collection of seasonal themes and decorations, enabling you to add the perfect touch for holidays or changing seasons. Whether you’re a real estate professional or a home staging enthusiast, DIY Betates is your comprehensive solution for transforming any space into a market-ready showcase with ease.

1. Unmatched Quality and Affordability

At the core of DIY Betates lies our commitment to excellence — our team of interior designers, graphic designers, and software engineers collaborate to deliver continuous monthly updates and upgrades. This dedication ensures that our library remains current, providing you with fresh and trendsetting design options. Our platform’s capability to render images of the highest quality is on par with PC-installed software giants like 3D Mark and Photoshop, as well as popular online tools such as VirtualStager, BoxBrownie, Styldod, ApplyDesigns, etc.

2. Competitive Advantage

Our strong suit is not just in the quality we deliver; it’s also in the affordability. We have streamlined our workflow to minimize overhead costs, which allows us to offer our services at a highly competitive price point. Starting at just $5 per image, you can access top-tier virtual staging solutions that rival those of more expensive alternatives.

With DIY Betates, you can elevate your listings without compromising on quality or breaking the bank.

3. Why Would You Choose DIY Betates?

  • Affordable Pricing: Exceptional value, with services starting at only $5 per image.
  • Unlimited Revisions: Freedom to revise and perfect your staged images until they meet your exact specifications.
  • AI-Powered Staging: Automated staging with AI that sets the foundation for your designs, which you can then refine to your taste.
  • User-Friendly Interface: Simple drag-and-drop functionality for ease of use, catering to users of all skill levels.
  • Advanced Customization: Extensive editing capabilities, allowing adjustments to furniture placement, lighting, size, length, shadow opacity, and direction, providing you with unparalleled precision and creative freedom.
  • Mass Virtual Staging: Efficiently apply a chosen style and furniture set across multiple images for consistent and rapid staging.
  • 3D Virtual Tours: Generate immersive 3D virtual tours from 360-degree images with custom viewpoints, fully compatible with VR headsets for a lifelike experience.

4. Basic Step-by-Step Guide For Getting Started with DIY Betates

Buying More Credit/Coin: Each beautifully staged image requires just one credit/coin to unlock. Get started with one complimentary coin upon your first login. Need more? Easily purchase additional coins either individually or in discounted bundles, allowing the cost per image to drop to as low as $5.

Uploading New Photos: For optimal virtual staging, we recommend uploading high-resolution photos of vacant properties. Once uploaded, our system swiftly scans your images, preparing them for the staging magic in just a few moments.

Catalog: Dive into our extensive catalog to explore a diverse collection of premade templates and styles. Find the perfect fit for your space and aesthetic preferences with just a few clicks.

Location: Your entire collection of past, present, and future project images is securely housed here. Revisit and refine your staged photos anytime for future revisions or updates.

Progress: Stay informed about the status of your virtual staging process. Our progress tracker lets you know when your images are fully processed and ready for your creative touch.

Guidelines Video: While your images are being prepared, take advantage of our instructional videos. These tutorials will guide you through the features of DIY Betatests, ensuring you make the most out of the platform.

Invite Your Friends: Spread the word about DIY Betatests and earn rewards! Receive up to one credit/coin for every new user you introduce to our platform. It’s our way of saying thank you for helping our community grow.

5. Advanced Step-by-Step Guide For Mastering DIY Betates

Insert / Remove / Duplicate Furniture: Effortlessly customize spaces by adding, removing, or duplicating furniture to perfectly showcase any property. Ideal for creating tailored, appealing listings that attract buyers and close deals faster.

Move / Scale / Rotate / Flip Furniture: Easily adjust furniture positioning and size to create the perfect layout, ensuring each property looks its best and appeals to potential buyers.

Clear Models / Undo Designs / Full Screen Editor / Environment Light Adjustment

  • Clear Models: Quickly start fresh by removing all furniture with a single click.
  • Undo Designs: Easily correct mistakes or change your mind with the undo option.
  • Full Screen Editor: Expand your canvas to focus on intricate details and design with ease.
  • Environment Light Adjustment: Fine-tune the lighting to create the perfect ambiance for any space.

360 Degree Virtual Staging & My Tour: Easily edit 360-degree virtual staging images and create immersive 3D rendered tours that bring listings to life. Combine multiple images to provide potential buyers with a comprehensive, interactive view of the property, enhancing their online browsing experience and increasing engagement.

Swap Furniture: Swap furniture by selecting an item; it will automatically replace the old furniture without the need to drag and drop.

Same Locations: When rendering an image, this feature helps you copy furniture from the previous image to another angle of the same room. Ensure the photos are in the same location.

Personal Collections:

  1. Save your favorite templates from our library for frequent use.
  2. Request us to upload your own 3D models to your personal library.
  3. Email us to inquire about creating 3D model furniture from your designs or real photos.

Auto Virtual Staging: Many clients do not have the time to stage photos themselves. We will stage and render a final complete image within 15-20 minutes. Simply upload the photos and select furniture codes from the available library.

6. Extra Features That You May Like When Using DIY Betates

Adjust Your Photo: Fine-tune saturation, contrast, brightness, and hue to perfect your image’s appearance.

Turn On/Off Furniture Layer And Background: Easily toggle furniture layers and backgrounds to see different staging options.

Add Watermark: Protect your images by adding custom watermarks.

Eraser Brush: Remove unwanted elements from your photos with precision.

View History: Access and review previous edits to refine your work.

Embed Virtual Staging Service Into Your Website: Integrate our virtual staging capabilities directly into your website for seamless user experience.

Custom Models To Your Own Personal Collections: Upload and use your own 3D models for personalized staging.

Virtual Reality Glasses Are Supported: Experience your virtual staging in immersive VR.

Manually All Services: Contact our team for fully customized service options tailored to your needs.

Betates – Your Best Online Team For Virtual Staging

Ready to transform your property listings? Contact DIY Betates today and discover how our virtual staging platform can elevate your real estate game. Reach out now and let’s create stunning, captivating spaces together!